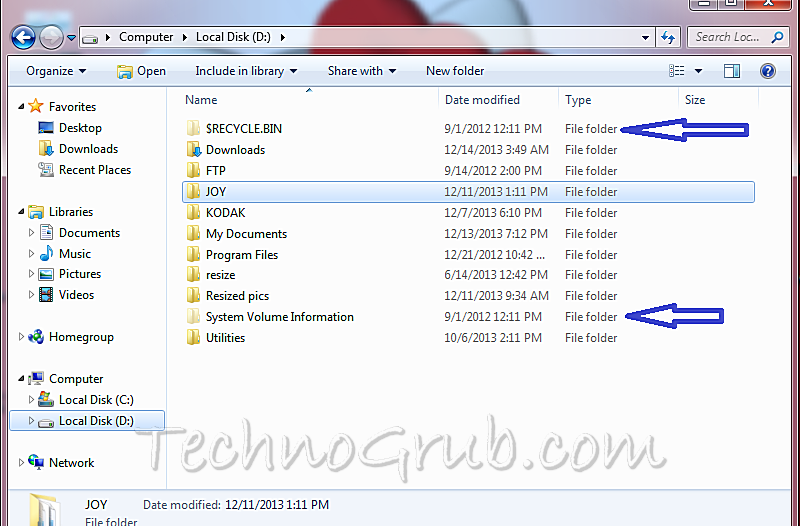
To protect system files from mistakenly being modified or deleted by the user, Windows hides particular files from being seen with Windows Explorer or My Computer by default. As certain system files are hidden, it is sad to say that spywares, hijackers and viruses take advantage on this feature so it will be harder for them to be discovered and located.
These hidden files when tampered can cause problems with the operation of your computer, so it is then advised to be careful when enabling the hidden attribute in a particular folder’s properties. This tutorial will give you a step by step procedure on how to show hidden files in Windows 7.
Cautiously follow the steps below on how to show hidden files in Windows 7.
- First thing to do is to close all programs opened, then go to your desktop.
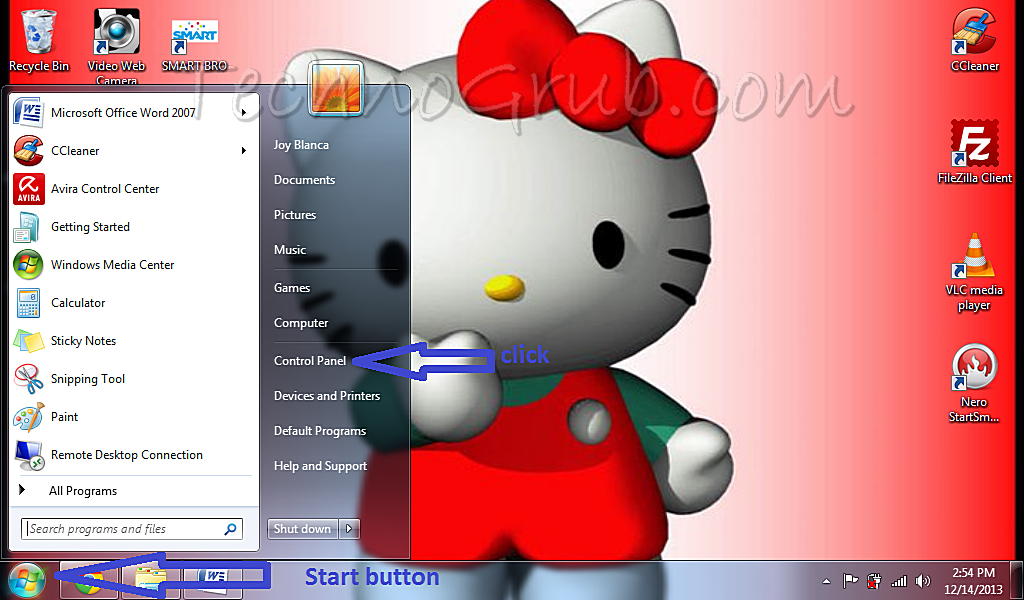
- Click on the Start button, then click on the Control Panel menu option.

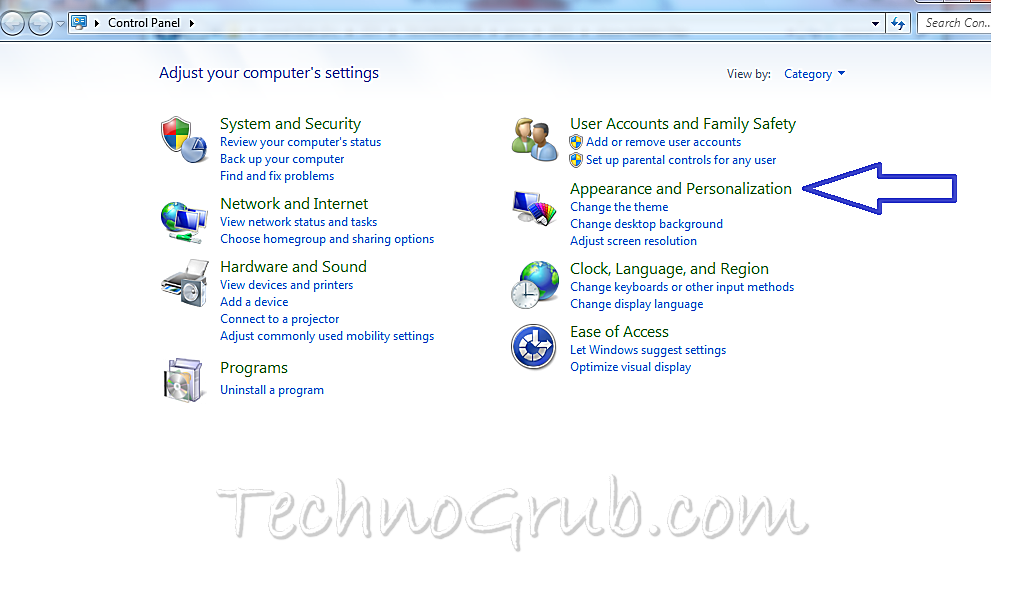
- When Control Panel opens, click on Appearance and Personalization. Please refer to image below.

- Go to Folder Options then click Show hidden files and folders.

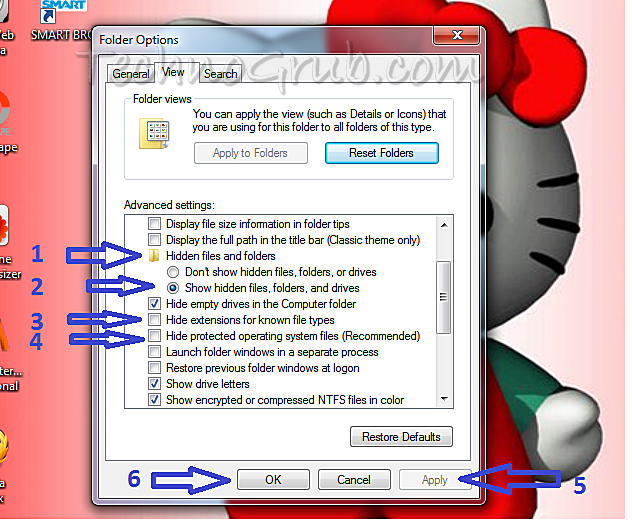
- Another Window will open Click on View. Scroll down on the advanced settings.

5.1 Click on Hidden files and folder.
5.2 Tick on the button labeled Show hidden files, folders, and drives
5.3 Uncheck the box labeled Hide extensions for known file types.
5.4 Uncheck the box labeled Hide protected operating system files (Recommended).
5.5 Click Apply
5.6 Click OK
Your Windows 7 settings will now be configured to show all hidden files.

Word of advise: When uncertain, always ask help from an expert before deleting suspicious hidden files.


